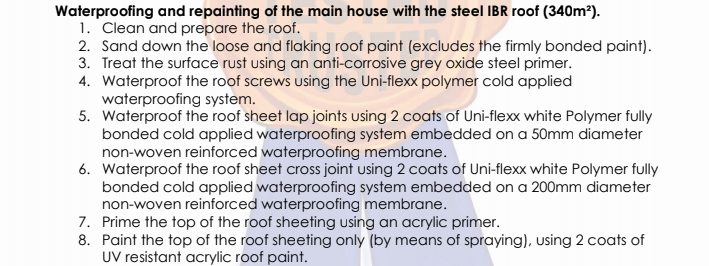
Static Serverless Ghost
I've been running Ghost as a CMS for this blog since 2017, so almost 7
Over the last few years, I've learnt some expensive lessons regarding the maintenance of our galvanised metal roof. This post is mainly to my future self, to not make the same mistakes. I wish I could imbue readers with the experience I have learnt, but like so much of the work I do on Digital Transformations, using Agile and DevOps, you need to combine your own experience with some best practices to truly understand how to really make a difference. Like Verner Vogels says, "there is no compression algorithm for gaining experience".
Unlike a tiled roof, this is a fairly flat roof, made up of IBR sheets. I'm not quite sure why the original owner chose a galvanised roof over a tiled roof, because I dont see many galvanised roofs around in our area.
We have been living in this house for about 13 years, and we did practically no maintenance on it for the first 7 years or so. Perhaps because I was used to a tile roof, and a good painting every 5 years is all that you need. So for the last few years, we noticed an increased build up of rust.
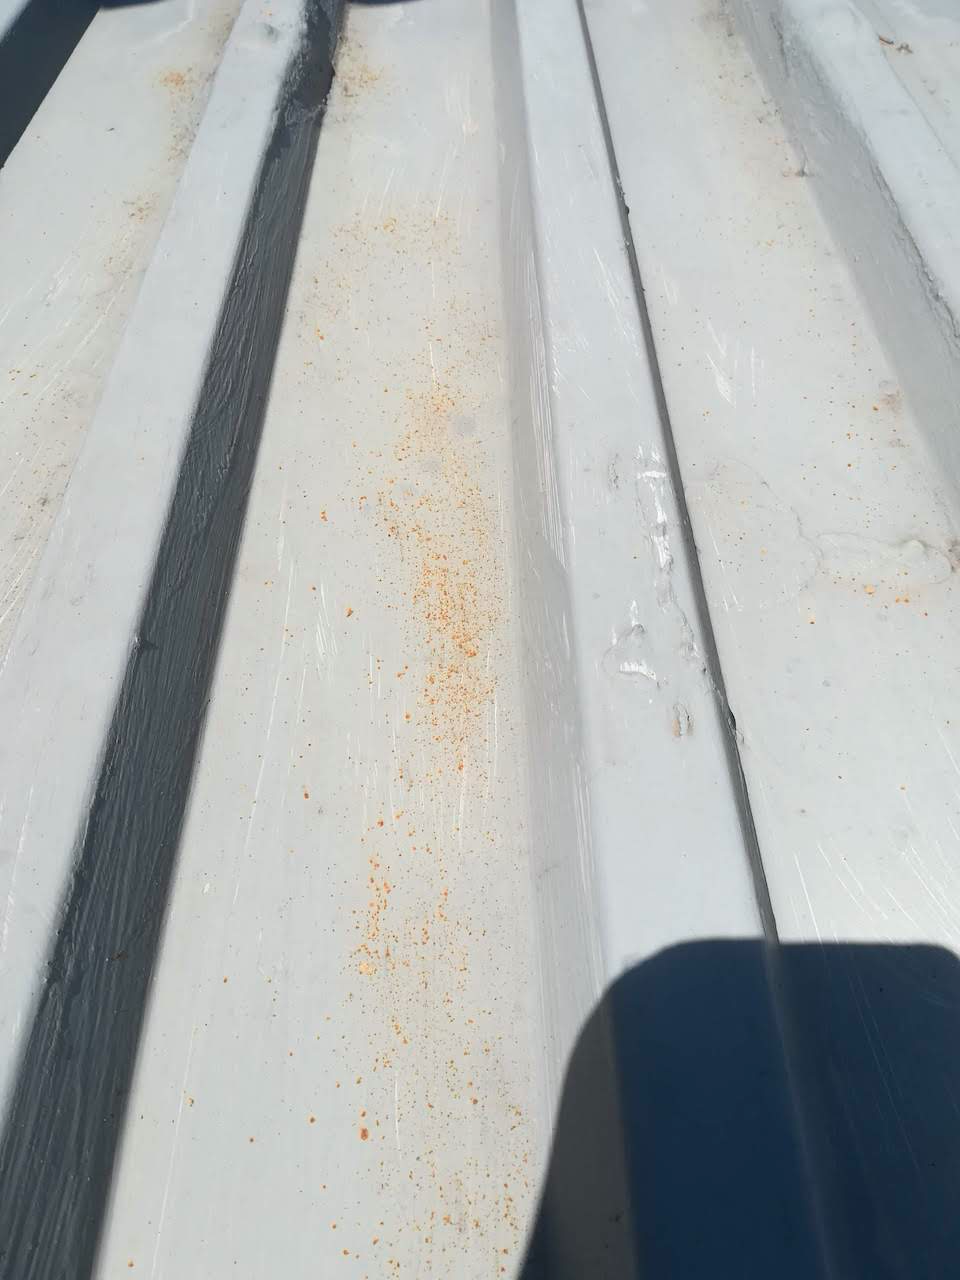
We got some painters out, went to Builders Warehouse, and bought paint. And thats where the expensive lessons start. Depending on how you find at Builders that day, the may direct you to specific product. Some will say galvanised metal does not need priming, some will say it does. So will say use a rust cleaner, some wont, or wont tell you that it needs to be washed off thoroughly after application because its corrosive. So after many rounds and years of using inexperienced painters, with differing advice from the shops selling the paint, we sprung quite a big leak. The rust had eaten right through the metal sheeting, and water was getting to the ceilings.
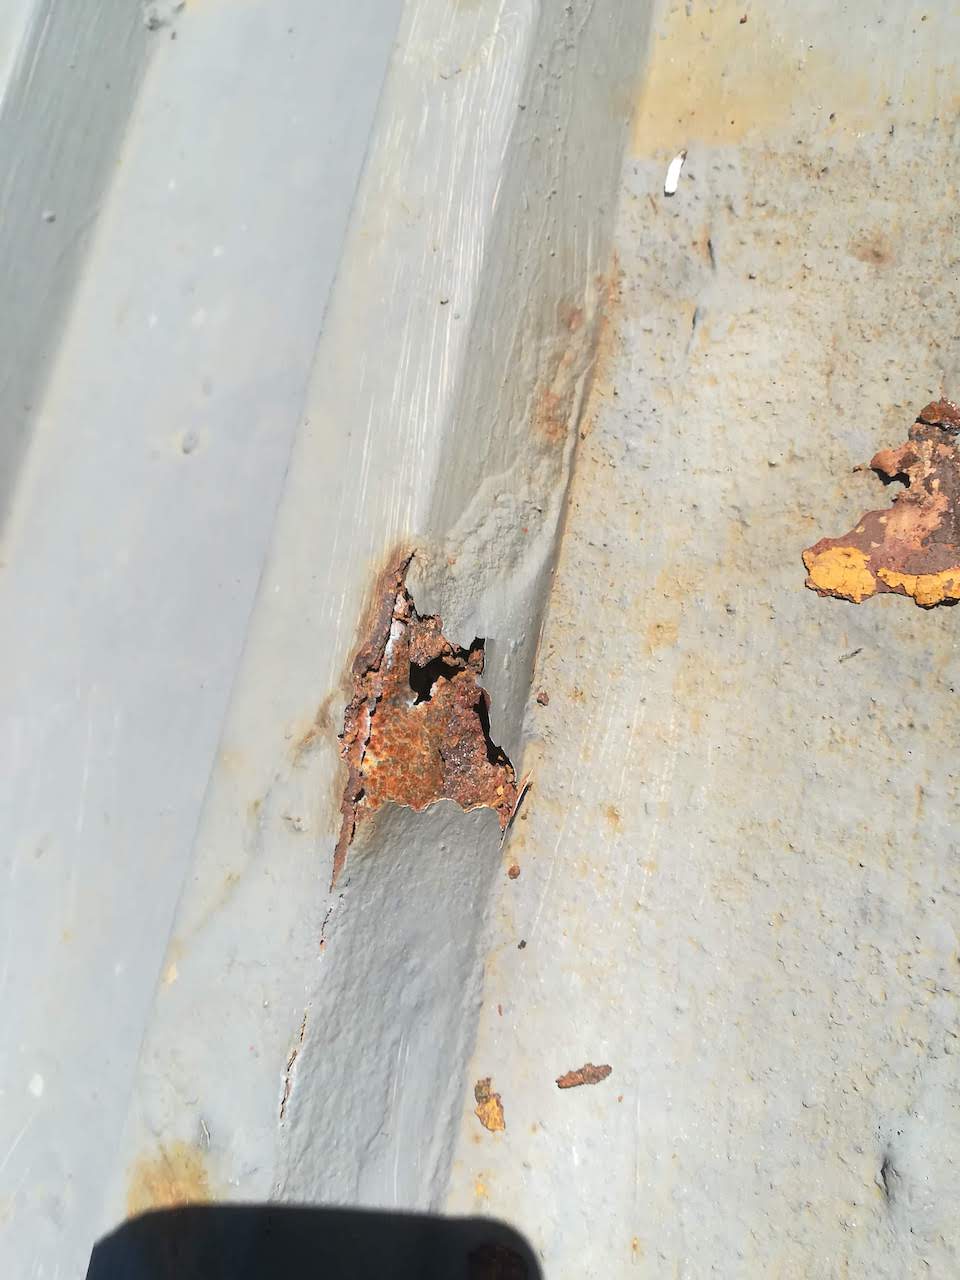
I then got a professions company out to assess the damage, as well as the paint manufacturer. They found a number of problems:
Basically, the mixture of inexperience (ourselves and the painters), differing and poor advice from stores, over the years had resulted in us just doing cover-up job over a bad foundation. Eventually, it was going to catch up to us.
We needed to replace the damaged sheets. When IBR sheets come out of the factory, it has an oil on it. You need to use a corrosive cleaner to remove this oil, wash it off, and then prime and paint. The advice we got is to let us naturally weather for 6 months, by which time the sun and rain will have removed the oily layer, then prime and paint.
Its actually really helpful to read the directions on the tin - alot of the guidance is there.
The best advice I received was from the paint manufacturer, who came out to inspect the roof:
I got this below from one of the quotes from a professional company, which validates why they so expensive, because they do it right from the start, and take all the guesswork out of it.